
Light up Odessa Nights with Safer, Stunning Paths
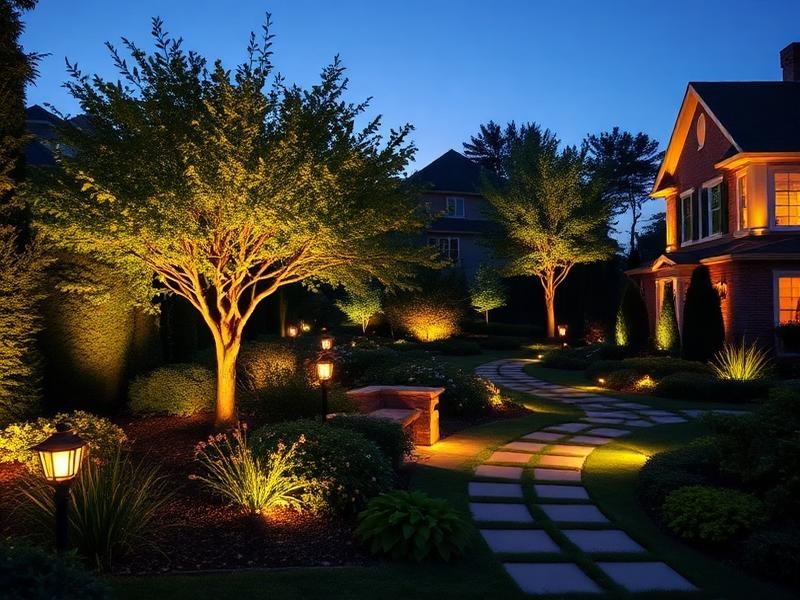
Pathway lighting is about more than seeing where you are going. The right layout turns simple garden paths and pool walkways into safe, beautiful routes you enjoy every evening. When lights are spaced and aimed correctly, you get smooth, even light without harsh glare in your eyes.
Many Odessa homeowners spend a lot of time outside in spring and through long summer evenings. After a quick storm or a late get-together, you want guests to walk confidently along pavers, around beds, and near the pool. In this guide, we will walk through smart spacing, beam angles, shielding, and simple layouts so your pathway lighting installation in Odessa, FL feels both safe and stylish.
Planning Your Pathway Lighting Like a Pro
Before a single fixture goes in the ground, a little planning makes a big difference. Start by walking your paths at dusk or just after dark when you naturally notice problem spots. Pay attention to where your feet land and where your eyes struggle.
As you walk, pay attention to:
- Elevation changes, slopes, and low spots
- Steps, single risers, and short stair runs
- Tight curves and blind corners
- Plants that overhang walkways
- Places guests actually cut through or gather
Next, think about your goals. Most pathways in Odessa need a mix of three things:
- Safety: clear edges, lit steps, and no dark gaps
- Ambiance: soft, warm pools of light, not harsh “stage” lighting
- Security: enough light to discourage unwanted visitors without bright flood lights in your face
Take a few minutes to sketch a simple map of your space. It does not need to look perfect. Just mark:
- Main paths, side paths, and driveways
- Entry doors and gates
- Existing trees, beds, and hardscape
- Power sources and transformer locations
- Places where lights might make sense
This rough plan will guide where fixtures should go so wiring runs are clean and the final look feels balanced, not random.
Perfecting Fixture Spacing and Beam Angles
Good spacing is what keeps your paths from looking like a runway or, on the flip side, a patchwork of bright and dark spots. For most low-voltage path lights, 6 to 8 feet apart is a solid starting point. The exact distance depends on the fixture, mounting height, and how bright you want the path.
Close that gap when you reach:
- Steps or risers, where each change in height needs clear light
- Curves, where you want to show the bend early
- Intersections where two or more paths meet
Beam angle matters just as much as spacing. A narrow beam puts more light in a smaller area and can work well for highlighting a single feature. A wider beam spreads light over a larger patch of path and nearby planting beds. Most shielded path lights are designed to “throw” light downward and out to the side, washing the walking surface instead of shooting up into your eyes.
Mounting height also changes the light footprint. A taller fixture tends to spread light farther but can cause more glare if the bulb is visible from above. A lower fixture keeps light closer and softer, which is perfect for cozy garden routes.
For a natural look, try staggering fixtures from side to side rather than lining them up in two straight rows. That runway look can feel a bit industrial in a backyard setting. A staggered pattern:
- Fills in shadows more gently
- Adds rhythm and interest as you walk
- Keeps lights from shining straight into people’s eyes
Shielding, Glare Control, and Neighbor-Friendly Lighting
Glare happens when you see the bright source of the light instead of the area being lit. On a pathway, that can mean temporary “blind spots” while your eyes adjust. In a neighborhood, it can also mean lights shining into windows or over fences.
To keep glare under control, think about:
- Fixtures with built-in shields or hats that hide the bulb from direct view
- Placing lights slightly back from the edge of the path, not right on it
- Aiming light away from seating areas, outdoor TVs, and windows
Odessa yards often include light-colored pavers, pool decks, or shell. These surfaces reflect a lot of light. That can be a good thing when you use it on purpose, because softer bounce light feels very comfortable on the eyes. It can also create extra glare if the light is too strong or aimed straight down on a bright surface.
A few simple habits help keep things neighbor-friendly:
- Avoid tall fixtures that shoot light outward at eye level
- Do not point path lights toward streets, driveways, or neighboring windows
- Choose warmer color temperatures for a calmer feel in shared views
If you live in a community with an HOA, pay attention to style and brightness so your lighting looks polished and consistent with the neighborhood rather than loud or distracting.
Step-by-Step Layouts for Odessa Garden Pathways
Now let us put it all together and talk through a few common layouts you might have at your Odessa home.
For a straight garden path:
1. Measure the full length of the path.
2. Decide how soft or bright you want it. Softer light usually means fixtures every 7 to 8 feet, brighter light may mean closer spacing.
3. Place your first light a few feet from the start of the path, not right at the edge, so the transition into light feels gentle.
4. Stagger fixtures from side to side as you move down the path to create a pleasing rhythm.
5. Check that the light pools overlap slightly so you do not see dark bands between fixtures.
For curved or branching paths:
- Place a light just before and just after each bend so the curve reads clearly.
- Use lighting to “point” people where you want them to go at forks or intersections.
- Highlight unique features along curves, like a palm, boulder, or fountain, with a nearby path light.
- Stand back and look for any dark pocket where two paths meet and add a fixture if needed.
In our warm, green climate, plants grow fast. When planning your pathway lighting installation in Odessa, FL, remember to:
- Leave space so shrubs and ornamental grasses do not grow over the fixtures
- Keep lights out of regular mowing and edging routes
- Make sure mulch or groundcover will not cover the lens or block the beam
A little extra thought in spring helps your system look great through summer and beyond without constant adjustment.
When to DIY and When to Call an Odessa Lighting Expert
Some very simple, short, straight paths may seem like they could work with a basic low-voltage kit. Even then, getting spacing, beam spread, and wiring right takes patience and practice. Once you add curves, multiple paths, pool cages, docks, or different levels in the yard, the layout becomes much more complex.
A professional lighting designer can:
- Match fixtures and beam angles to your specific surfaces and plants
- Balance voltage so lights at the end of long runs are not dim
- Plan around irrigation, roots, and hardscape for a cleaner install
- Set up a system that is easier to maintain and adjust as your yard grows
At Elegant Accents Outdoor Lighting, we design, install, and maintain custom outdoor lighting for homes and businesses across the Tampa Bay area, including Odessa. Thoughtful pathway lighting is one of our favorite ways to make evenings safer and more beautiful. With a smart layout and expert planning, your garden paths can feel inviting every single night.
Transform Your Evenings With Safely Lit, Beautiful Pathways
Let Elegant Accents Outdoor Lighting create a welcoming, easy-to-navigate outdoor space with professional pathway lighting installation in Odessa, FL. We carefully design and install lighting that highlights your walkways while improving safety and curb appeal. If you are ready to discuss your ideas or schedule a consultation, simply contact us and we will help you get started.